Arlington's Emergency Squad: Finding Your 24-Hour Plumber
Facing a plumbing emergency in Arlington? Find reliable 24 hour plumbers in arlington. Get immediate help & prevent damage.


Installing a garbage disposal can transform your kitchen cleanup and protect your plumbing from clogs. Here's a quick overview of the process and benefits.
Quick Installation Overview:
A garbage disposal cuts down on trash odors by disposing of food waste immediately, saves space in your trash by reducing the volume of organic waste, and provides an easy method for disposing of food scraps when composting isn't an option.
Most homeowners can complete this project in less than 3 hours with basic tools and the right guidance. However, if you need electrical work like installing a new outlet or feel uncomfortable with any step, it's wise to call a professional.
While it involves some heavy lifting and careful plumbing, the process is manageable for experienced DIYers with basic tools and safety gear.

Proper planning is key to a smooth garbage disposal installation. Gathering the right tools and choosing the correct unit beforehand prevents mid-project headaches and extra trips to the hardware store.
Choosing the right garbage disposal depends on your household needs and cooking habits. Here are the key factors to consider.
The Big Choice: Continuous Feed vs. Batch Feed
Continuous feed disposals are the most common type, operated by a switch. For homes with small children, a batch feed model offers improved safety, as it only runs when a special stopper is in place.
FeatureContinuous FeedBatch FeedOperationFood waste is added continuously while unit runsFood waste is added in batches; unit runs only when stopper is in placeControlWall switchStopper activates the unit (magnetic or mechanical)SafetyRequires more caution; can be activated accidentallySafer, as objects cannot fall in while running; ideal for homes with childrenConvenienceFaster and easier for large amounts of wasteSlower due to batch processingCostGenerally more affordable upfrontOften more expensive upfrontInstallationMay require more complex electrical wiring (dedicated circuit)Often has lower installation costsNoiseCan be louderGenerally quieter
Batch feed models are also generally quieter, which is a plus for open-concept kitchens.
Power Matters: Getting the Right Horsepower
More horsepower means better performance. A 1/3 HP unit is fine for soft scraps and light use. If you cook for a family, you'll want at least 3/4 HP to handle tougher waste without jamming. For large households or serious cooks, 1 HP or higher units are workhorses that can grind almost anything, saving you frustration down the road.
Special Considerations for Your Home
If you have a septic system, you'll need a disposal specifically designed for it to protect your tank's natural processes. Also, pay attention to the grinding chamber material; stainless steel components resist corrosion and last longer. Many newer models also include noise-reduction features.
For more insights on why installing a disposal is worth it, check out Why Get Garbage Disposal Installation?.
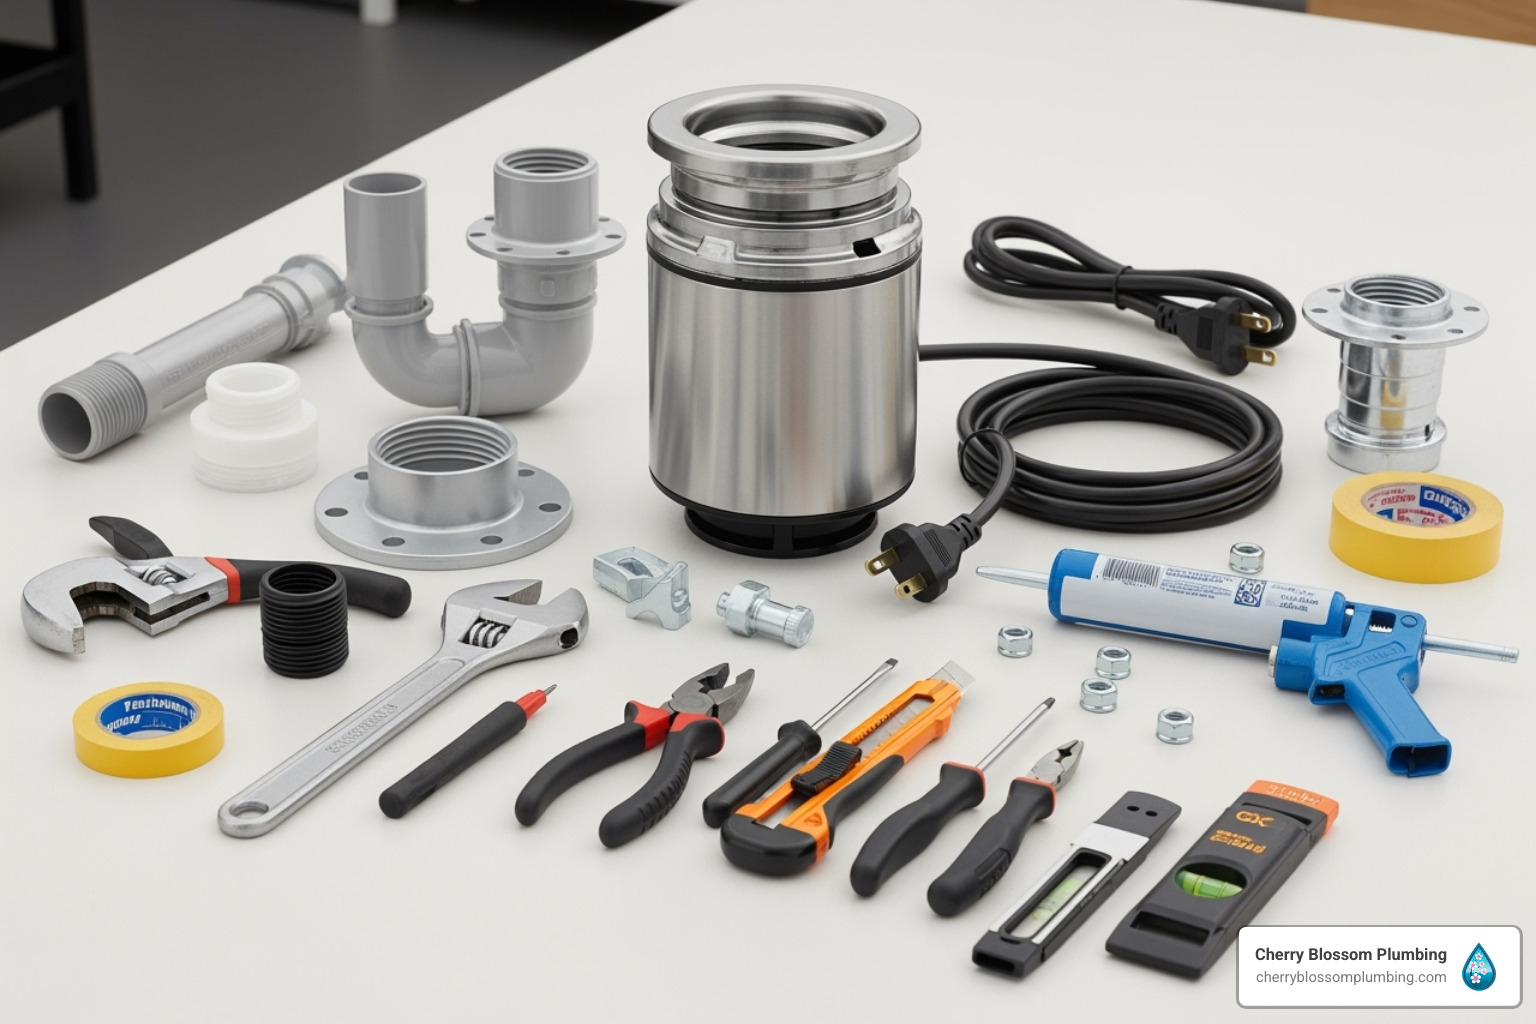
Gather these tools and materials before you begin to ensure the project goes smoothly.
Your Tool Arsenal
Materials You'll Need
Being aware of common issues can help you avoid problems during installation. Take a look at Garbage Disposal Issues Homeowners Should Know to get ahead of potential challenges.
Having everything ready beforehand ensures you can complete the job without delays.
With your tools and new disposal ready, it's time to begin. While learning how to install a garbage disposal may seem daunting, this step-by-step guide makes it a manageable DIY project. Prioritize safety as you follow these instructions to add convenience to your kitchen and protect your plumbing.

Safety is non-negotiable. Turn off power to the disposal at the circuit breaker. Use a voltage tester to confirm the power is off before touching any wires. It's also wise to turn off the water supply valves under the sink.
To remove the old unit:
For more detailed safety guidelines, check out our guide on Safe Garbage Disposal Installation.
A proper seal is crucial to prevent leaks. Start with a clean, dry sink drain opening. Apply a 1/2-inch rope of plumber's putty to the underside of the new sink flange.
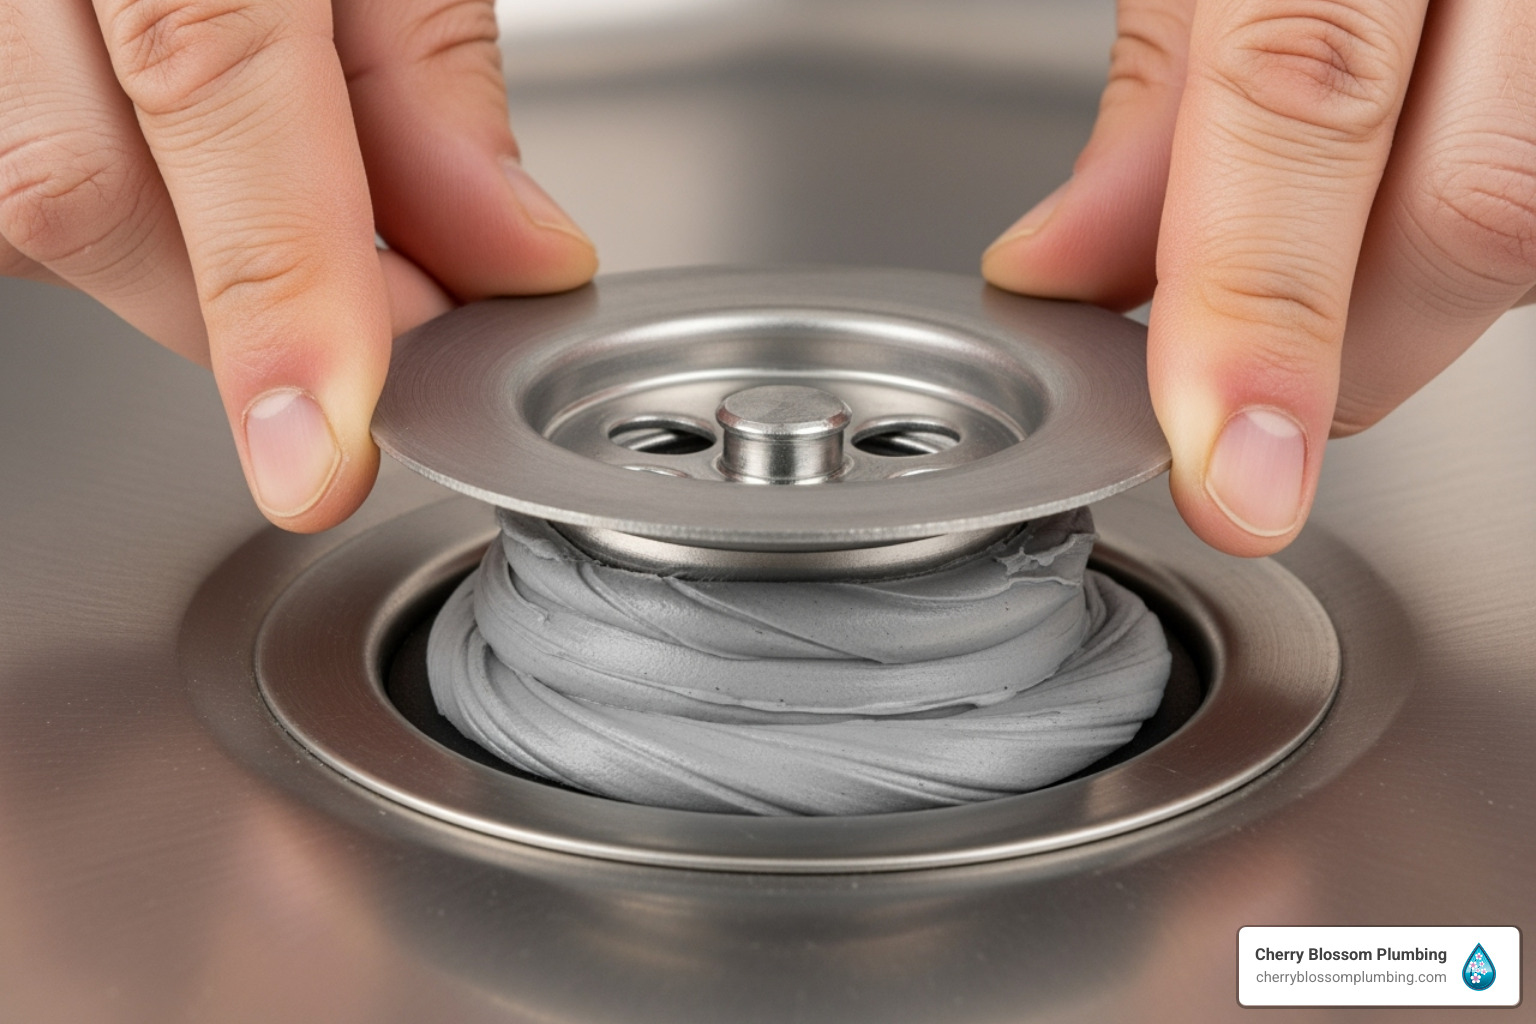
Press the new flange firmly into the sink drain from above. From below the sink, slide the fiber gasket, backup flange, and mounting ring onto the flange's tailpiece. Secure them by snapping the metal snap ring into its groove.
Tighten the mounting screws evenly and gradually, alternating between them to ensure even pressure. Excess putty will squeeze out around the flange in the sink; this is a good sign of a tight seal. Wipe away the excess.
Confirm the power is still off with your voltage tester. If you are not comfortable with wiring, call a professional. Remove the electrical cover plate on the new disposal.
Connect the power cord by matching the wire colors: white to white (neutral) and black to black (hot). Secure the green or bare copper grounding wire to the green grounding screw. Secure each connection with a wire nut.
If you need a visual guide for wire connections, this video is helpful: How Do I Connect Two Wires?
If you have a dishwasher, you must remove the knockout plug from the disposal's inlet. Use a screwdriver and hammer to tap it out, then retrieve the plug from inside the grinding chamber. Your dishwasher will not drain if this plug is left in place.
Once wiring is complete, replace the cover plate. For expert assistance with professional installation, our team at Expert Disposal Installation for Waste is always ready to help.
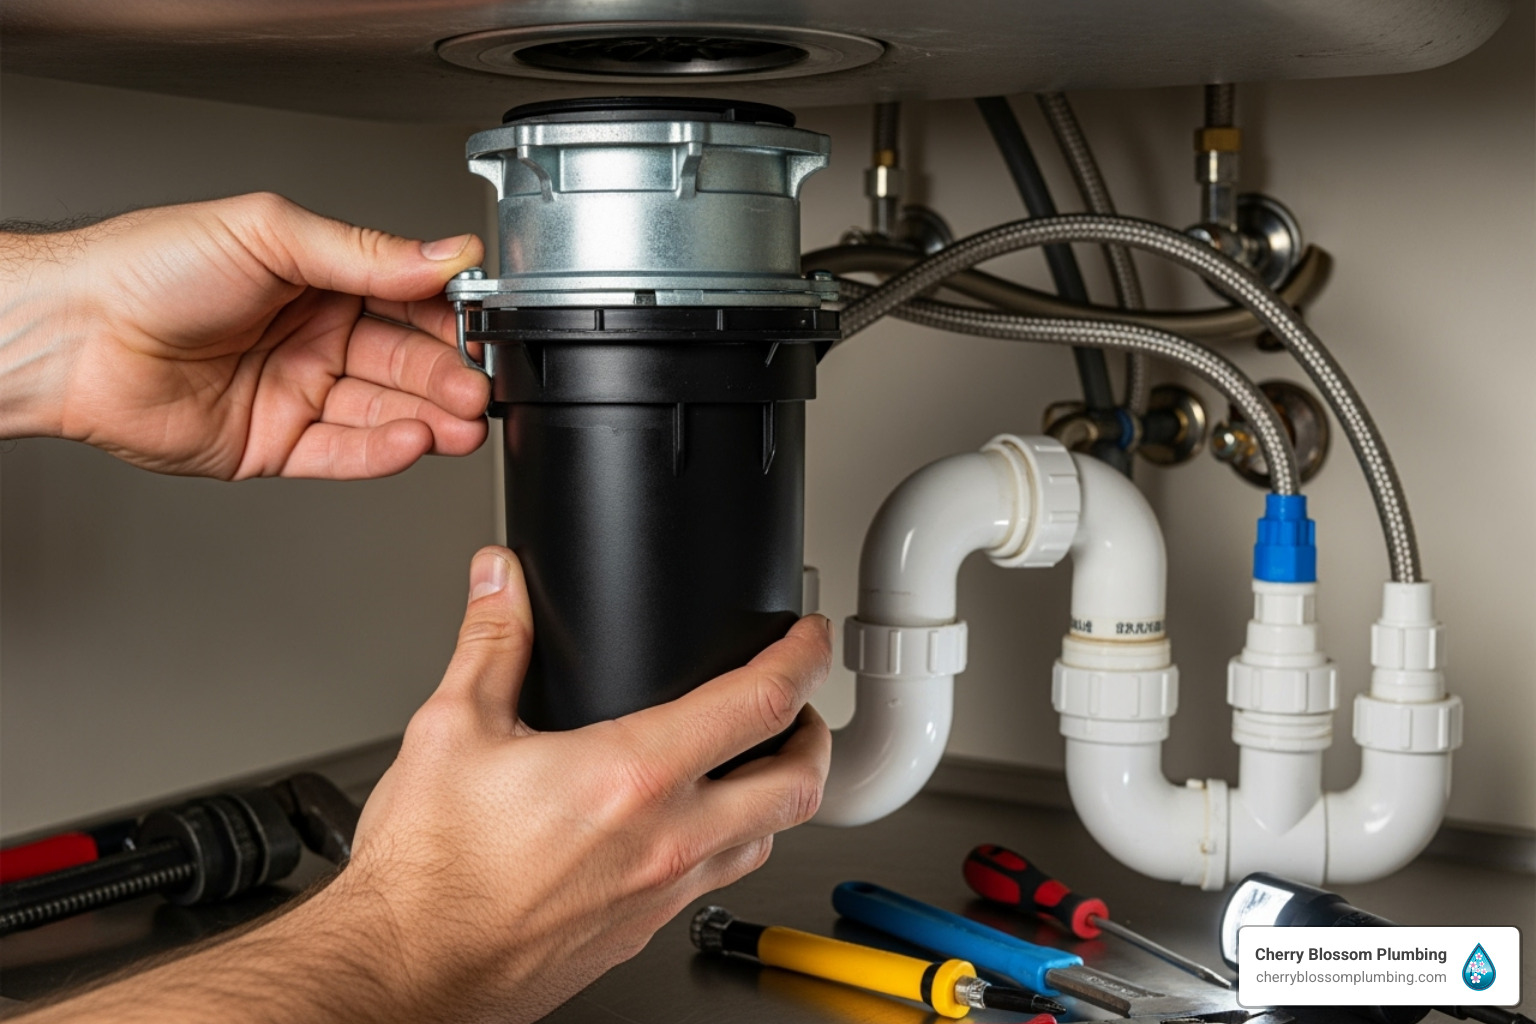
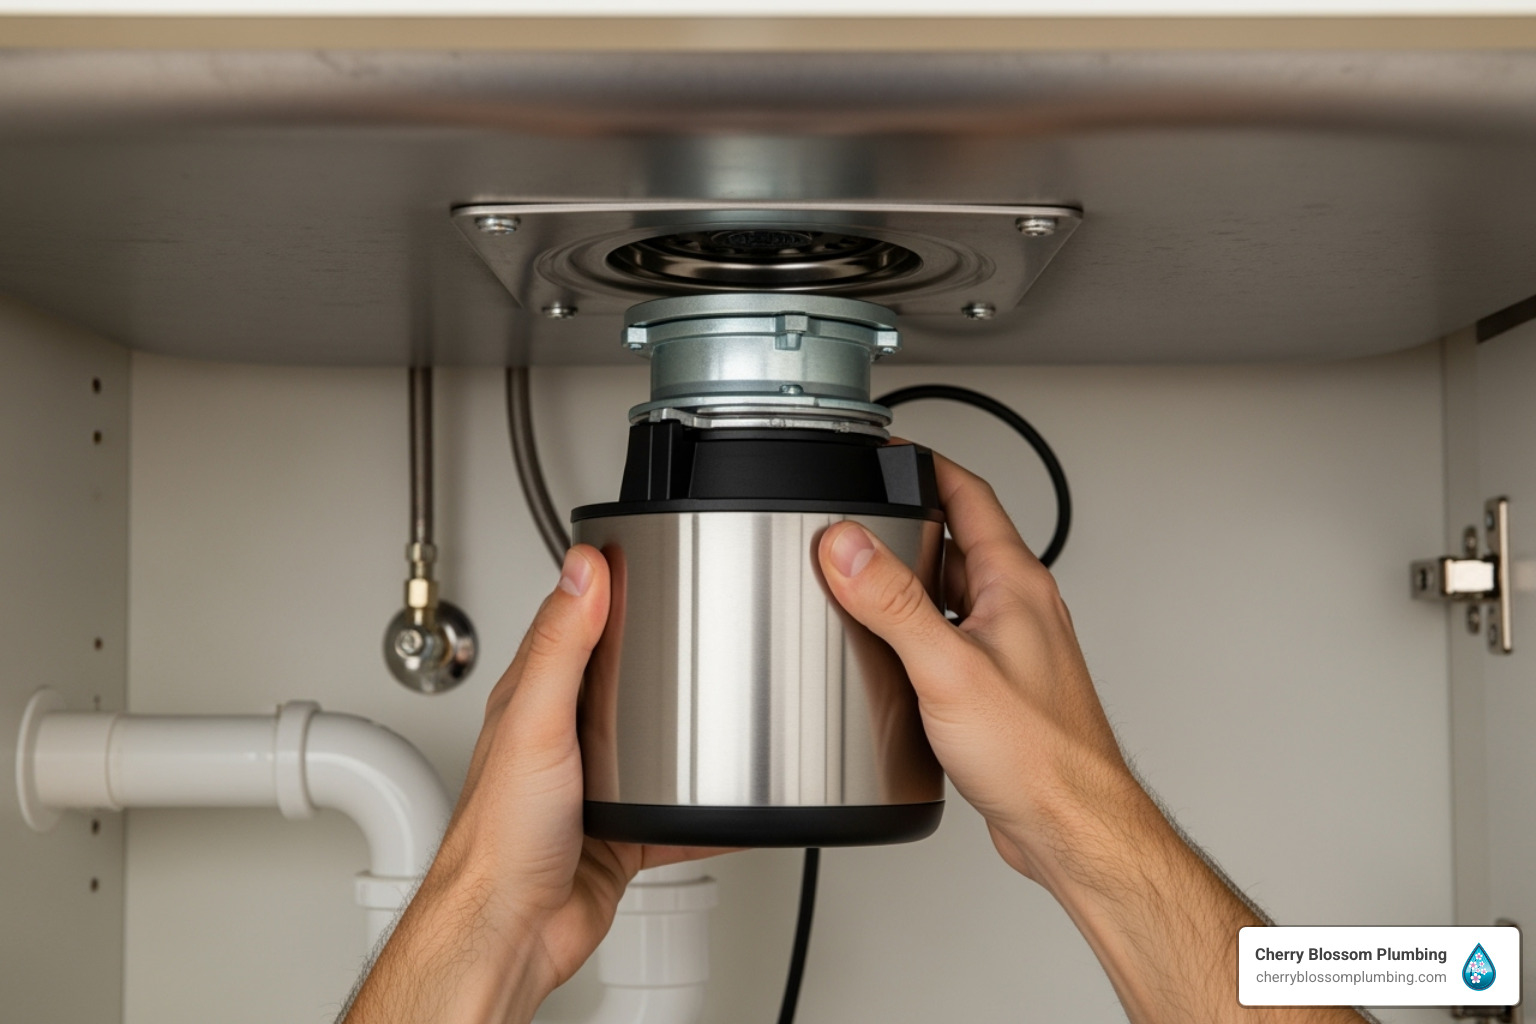
The final step is to mount the unit and connect the plumbing.
Lift the disposal and align its mounting lugs with the mounting ring. Rotate the ring clockwise until it locks securely into place.
Insert the rubber gasket into the discharge outlet and attach the discharge tube. Connect the tube to the P-trap and drain line. You may need a hacksaw to trim pipes for a perfect fit. Hand-tighten all slip nuts, then give them a quarter-turn with pliers. Use Teflon tape on threaded connections for extra leak protection.
If you have a dishwasher, connect its drain hose to the dishwasher inlet and secure it with a hose clamp.
For detailed information about dishwasher drain connections, this resource is invaluable: How to connect your dishwasher drain. And for a complete overview of the installation process, check out our comprehensive guide on Garbage Disposal Installation Steps.
After completing the installation, it's time to test your work and learn key maintenance tips for long-term performance.
Follow these final steps carefully to ensure a leak-free installation.
Follow these maintenance tips to keep your disposal running smoothly and prevent common issues.
For comprehensive guidance on keeping your disposal in top shape, check out our detailed tips on Maintaining Efficient Garbage Disposal Tips.
Here are answers to common questions about how to install a garbage disposal.
The cost to install a garbage disposal depends on several factors. A DIY installation only includes the cost of the unit and materials. Hiring a professional adds labor costs but ensures the job is done correctly and safely. Costs are affected by:
For expert repair and installation services, reach out to us at Garbage Disposal Expert Repair and Installation.
Yes, garbage disposal hookups and drain sizes are largely universal. Most sink drains are a standard 3 1/2 to 4 inches, and disposal outlets are a standard 1 1/2 inches, fitting existing P-traps. Mounting systems are also fairly standard.
The main thing to check is the physical size of the unit. Disposals vary in height and width, so measure your under-sink cabinet space to ensure your chosen model will fit before you buy.
For professional guidance on choosing the right fit for your space, consider our expertise in Expert Garbage Disposal Installation.
While many homeowners can install a garbage disposal, hiring a professional is the smartest choice in certain situations:
For reliable garbage disposal repair and installation services, check out Garbage Disposal Repair and Installation.
You now have a complete guide on how to install a garbage disposal. For many, this is a rewarding DIY project that makes kitchen cleanup faster and protects plumbing. There's nothing like the satisfaction of a successful installation.
However, we understand that not everyone has the time or comfort level for this project. If you encounter complex plumbing, need new electrical work, or simply prefer a professional touch, our team at Cherry Blossom Plumbing is ready to help.
As a family-owned, licensed plumbing service in Arlington and Falls Church, VA, we pride ourselves on doing the job right the first time. We provide fast, reliable, and honest work with our signature "WOW factor" guarantee—no surprises, just straightforward, impressive service.
Our team serves the entire Northern Virginia area, including Arlington VA, Alexandria VA, Annandale VA, Fairfax VA, Falls Church VA, McLean VA, Oakton VA, Springfield VA, and Vienna VA. We handle everything from simple replacements to complex installations.
We bring the tools, expertise, and experience to get your new disposal running quickly and correctly, saving you time and worry.
Ready to upgrade your kitchen with professional help? For professional garbage disposal installation in Alexandria, VA, contact our expert team today! We're here to make your kitchen cleanup dreams come true.
Cherry Blossom Plumbing has consistently provided top-notch service, ensuring every issue is resolved efficiently and professionally.

I had a plumbing emergency, and these folks did an awesome job! Joe, the plumber assigned to our job, was very professional and, like me, is also a military veteran. Joe quickly developed a solution and fixed the problem. It was cold outside and the space he had to work in was challenging, but he got the job done!

Very friendly, communicative, and helpful from start to finish. Joe was incredibly thorough and kind in explaining to me what was going on and I appreciated his honesty in not trying to upsell me on something that wouldn't make a difference. Will definitely be calling these folks for future needs!
We had excellent service from Joe with Cherry Blossom Plumbing. He was thorough, fast, and did impeccable work. We will definitely be calling Cherry Blossom Plumbing for our plumbing needs from now on and we'll be requesting Joe.
Scheduling an appointment was easy. We had a litany of plumbing needs, and Chris walked us through his recommendations as well as areas where he did not think it made sense to spend money and negotiated a very fair price. Chris also executed everything he said he would very quickly and the project turned out well.
Joe was able to quickly diagnose the issue and provide recommendations. He took the time to thoroughly explain the situation and the various options, this was extremely helpful for a new homeowner like myself. He was timely and efficient. Would highly recommend.