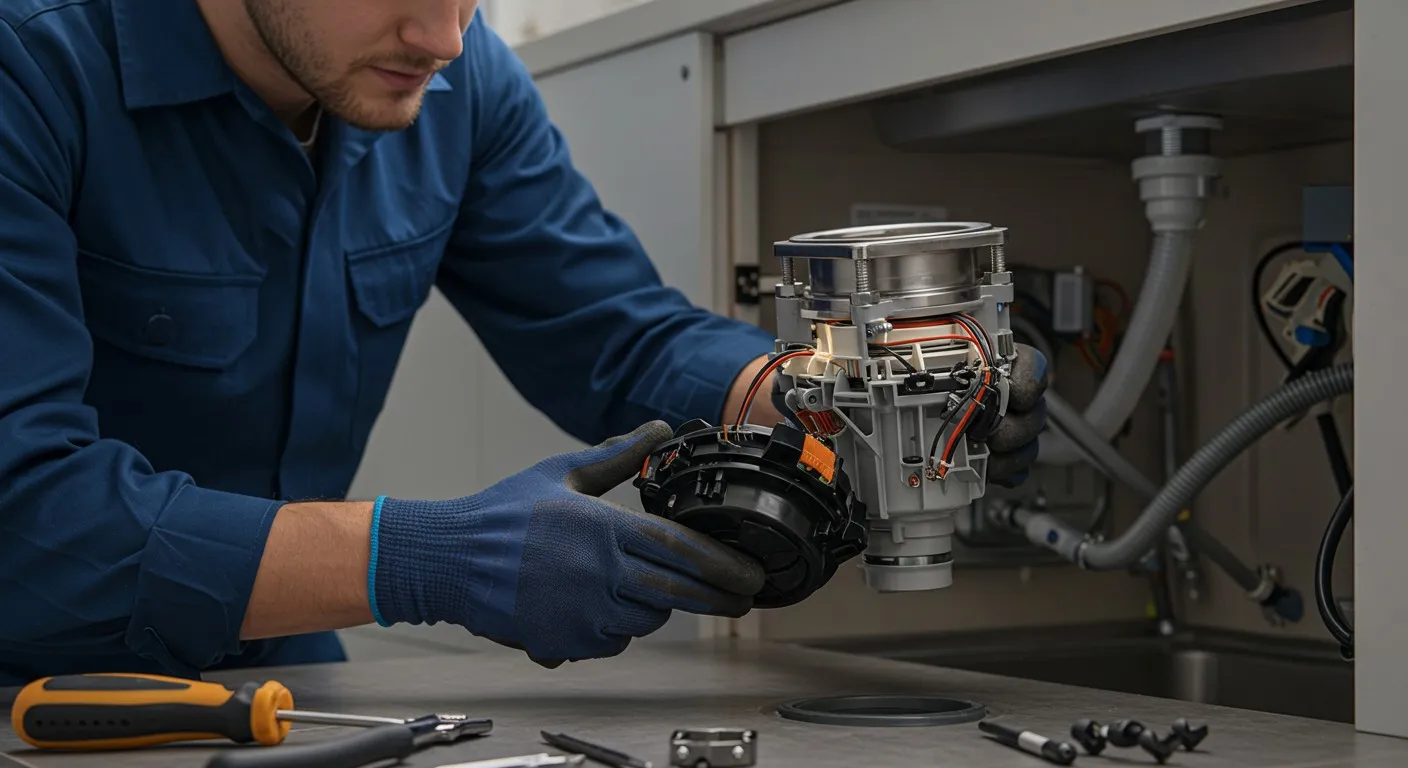
Why Gas Water Heater Installation Matters for Your Home
Gas water heater installation is a critical project for ensuring reliable hot water and improving energy efficiency. Proper installation of a new unit provides years of dependable service.
Key steps for gas water heater installation:
- Turn off utilities - Shut off gas, water, and electricity.
- Drain the old tank - Connect a garden hose to the drain valve and empty it.
- Disconnect lines - Remove gas, water, and venting connections.
- Remove old unit - Lift out the old water heater and clean the area.
- Position new unit - Level the new heater with proper clearance (6+ inches).
- Connect water lines - Install heat trap fittings and connect supply lines.
- Connect gas line - Use gas-rated sealant and test for leaks.
- Install venting - Connect the vent pipe to the draft hood with the proper slope.
- Fill and test - Fill the tank, bleed air, light the pilot, and verify operation.
Common signs that a water heater needs replacement include cold showers, rusty water, or strange noises. Units over 10 years old often show declining performance.
Upgrading to a new gas water heater brings immediate benefits like lower operating costs and improved reliability. Modern units can significantly reduce energy consumption.
Important safety note: Gas water heater installation involves working with gas lines, which can be dangerous. Professional installation is recommended for gas connections, venting, and code compliance.
Before You Begin: Safety, Tools, and Preparation
Successful gas water heater installation depends on thorough preparation, the right tools, and prioritizing safety above all else.
Critical Safety Precautions
Working with gas appliances carries real risks, including leaks and carbon monoxide exposure.
- Turn off the gas supply first. Find the gas shut-off valve leading to your water heater and close it completely. If you are unsure, call a professional.
- Turn off the water supply by closing the cold water valve to your unit. Shutting off the main water supply is also a good precaution.
- Prevent carbon monoxide risk. This invisible, odorless gas is a byproduct of gas water heaters. Proper ventilation is a matter of life and death. Ensure your installation area has adequate airflow and install a carbon monoxide detector.
- Leave gas lines to professionals. Gas line work requires special training, tools, and licensing. One small mistake can have catastrophic consequences.
- Wear protective eyewear to prevent serious eye injuries from debris or splashing water.
Gathering Your Tools and Materials
Have these items ready before you begin:
- Tools: Pipe wrenches (2), adjustable wrench, tubing cutter, pliers, Phillips and flathead screwdrivers, carpenter's level.
- Materials: Yellow gas-rated thread seal tape, gas leak detection solution, garden hose, new flexible water supply lines, bucket and towels, wire brush, clean rags, plastic shims, and duct tape for vent connections.
- Components: A new Temperature & Pressure (T&P) relief valve is recommended.
Choosing the Right Water Heater: Tank vs. Tankless
Your choice of unit affects the installation approach and your long-term energy bills.
Feature | Tank-Style Gas Water Heater | Tankless Gas Water Heater |
---|---|---|
How it Works | Stores and continuously heats a reservoir of water | Heats water on demand as it flows through the unit |
Upfront Cost | Generally lower | Generally higher |
Operating Cost | Uses energy to maintain tank temperature | Can reduce energy consumption by up to 30% |
Efficiency | Less efficient due to standby heat loss | Highly efficient with no standby heat loss |
Hot Water Supply | Limited by tank size | Continuous hot water within flow rate limits |
Size/Space | Larger, requires dedicated space | Compact, wall-mounted, saves space |
Lifespan | Typically 10-15 years | Can last 15-20 years or more |
Installation | Simpler if existing infrastructure matches | May require gas line upgrades, new venting, and electrical work |
Tank-style units are a straightforward replacement for most homes. Tankless units offer superior energy efficiency but often require a more complex installation, including larger gas lines and new venting systems.
Consider your family's hot water needs, space, and budget. For more on tankless options, see our guides on All About Tankless Water Heater Systems and the Benefits of Tankless Water Heaters.
Step-by-Step: Removing the Old Water Heater
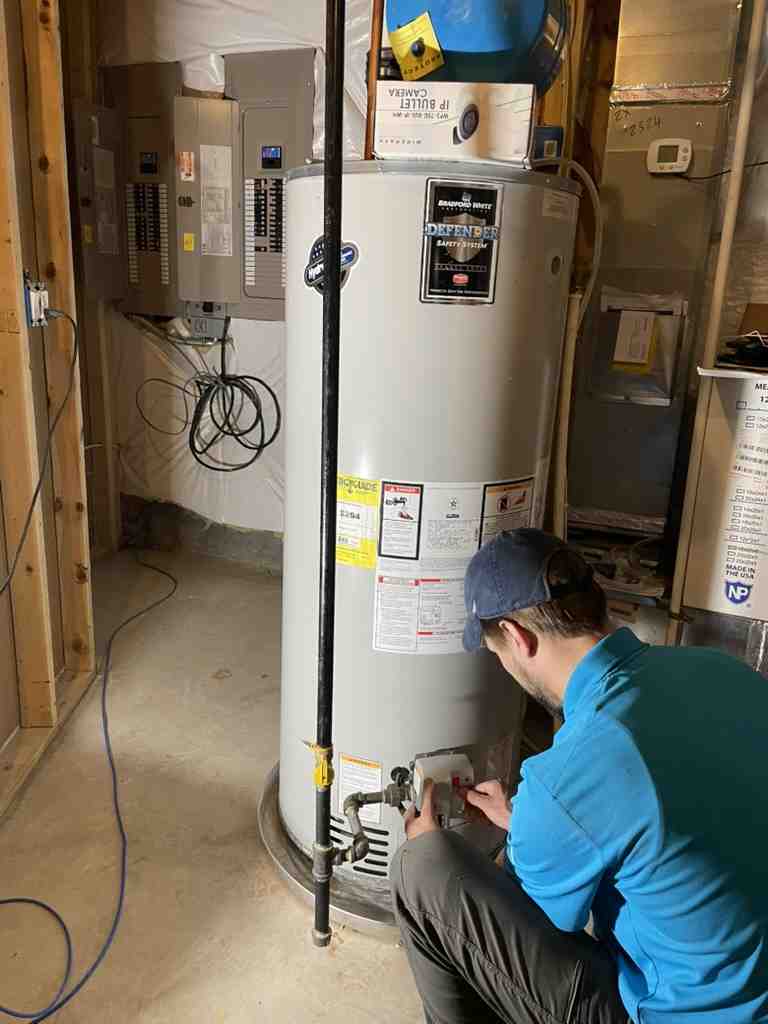
Removing your old gas water heater installation clears the way for your new, more efficient unit.
Draining the Old Tank
Before moving the tank, you must empty it.
- Turn off the gas and water supply to the water heater.
- Connect a garden hose to the drain valve near the bottom of the tank. Run the other end to a floor drain or outside.
- Open the drain valve, then open a hot water faucet elsewhere in the house. This allows air into the system, helping the tank drain faster.
Caution: The draining water can be scalding hot. The water may also be rusty due to sediment buildup, which can slow the draining process.
Safely Disconnecting Gas and Water Lines
With the tank empty, you can disconnect the lines.
- Gas Line: Double-check that the gas is off. Use two pipe wrenches—one to hold the pipe steady and the other to turn the union nut—to disconnect the gas line. This prevents damage to the gas piping.
- Water Lines: Use adjustable wrenches to remove the cold water inlet and hot water outlet connections. If you have soldered copper pipes, use a tubing cutter.
- T&P Valve: Remove the Temperature & Pressure (T&P) relief valve and its discharge pipe. You will install a new one on the new unit.
Removing the Old Unit and Venting
Old water heaters are heavy, often weighing over 100 pounds even when empty due to sediment.
- Detach the vent pipe from the draft hood on top of the water heater. Inspect the existing vent pipe for damage or corrosion; plan to replace it if it looks compromised.
- Remove the unit with a helper. Do not attempt to lift it alone.
- Dispose of the old unit properly. Check with your local waste management service for rules on appliance disposal or recycling.
- Clean the installation area thoroughly. Scrape away any rust or debris to create a clean foundation for the new heater.
A Guide to Gas Water Heater Installation
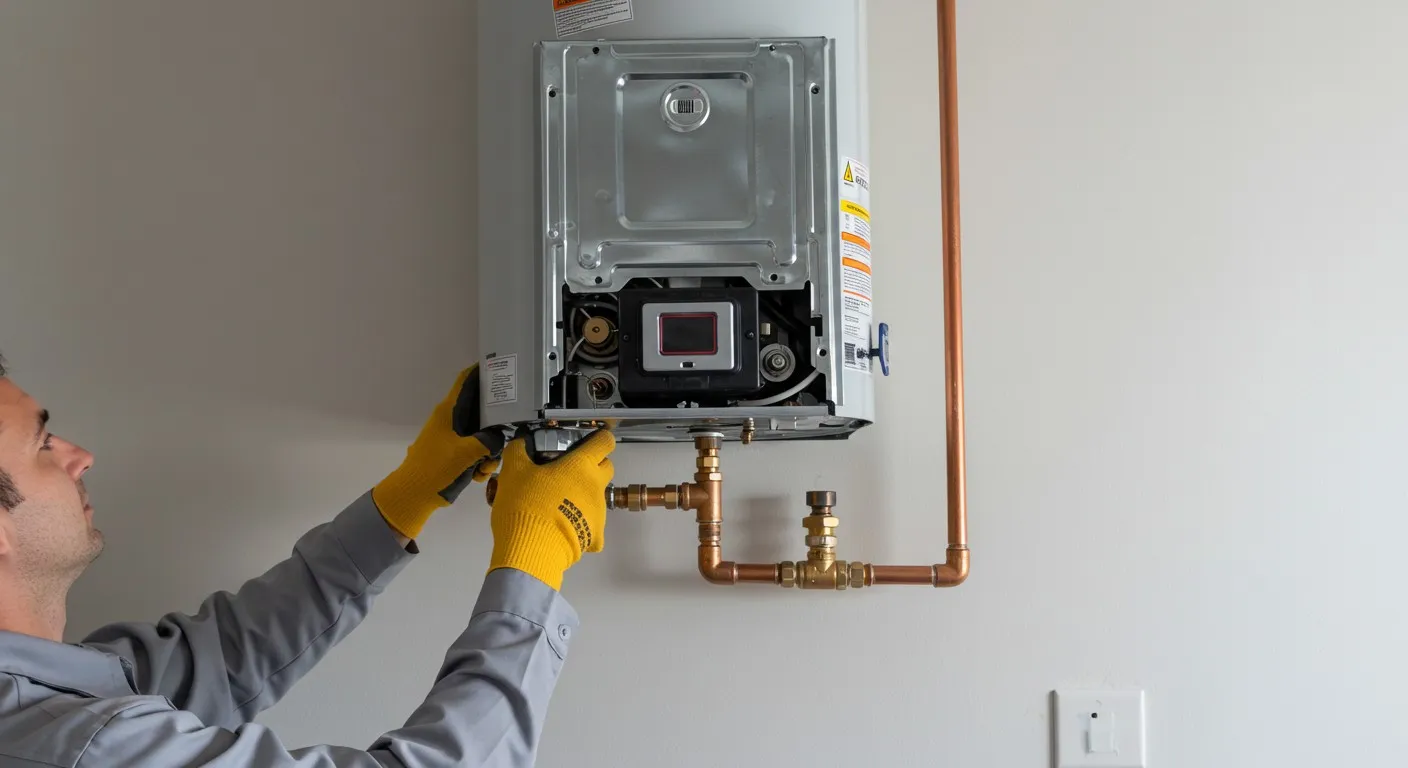
This is where your careful preparation pays off as you install the new heart of your home's hot water system.
Positioning and Preparing the New Unit
Proper positioning is the foundation for a successful installation.
- Check the size: Water heaters made after 2015 are often larger than older models of the same capacity due to increased insulation. Measure your space before purchasing.
- Ensure clearance: The unit needs at least 6 inches of clearance on all sides for ventilation and maintenance access.
- Level the unit: Use a carpenter's level and plastic shims to ensure the heater is perfectly level. This is critical for proper operation.
- Add seismic straps: If you live in an earthquake-prone area, local codes will likely require seismic straps to secure the heater to the wall.
Connecting Water Lines and Fittings
- Install heat trap fittings: These prevent hot water from rising into your cold water pipes. The arrow on the fitting should point toward the heater on the cold inlet and away from it on the hot outlet. Use thread seal tape on all threaded connections.
- Connect water lines: Attach the cold water inlet (blue) and hot water outlet (red). For copper pipes, this requires soldering. For an easier approach, flexible water heater connectors made of braided stainless steel are an excellent alternative.
- Install the T&P valve: Place the new Temperature & Pressure relief valve in its designated opening and attach the discharge pipe, running it to a safe drainage location.
For more details, see our guide on Hot Water Heater Installation Steps.
The Critical Gas Line Connection and Leak Test
This step is the most critical and dangerous part of the installation. If you feel uncertain, call a professional.
- Clean pipe threads: Use a wire brush to remove old sealant and debris from the gas inlet and supply line threads.
- Apply sealant: Use yellow, gas-rated thread seal tape or pipe joint compound on the male threads of the connections.
- Assemble fittings: Connect the gas shut-off valve, any necessary adapters, and the union fitting. Use two pipe wrenches to tighten fittings without stressing the pipe.
- Turn on gas: Slowly turn the main gas supply valve back on.
- Perform a leak test: Apply gas leak detection solution (or soapy water) to every gas connection. If you see bubbles, a leak is present. Immediately turn off the gas, tighten the connection, and re-test until no bubbles appear.
Venting, Lighting, and Final Checks for your Gas Water Heater Installation
These final steps ensure safe, efficient operation.
- Connect the vent: Attach the vent pipe to the draft hood, ensuring it slopes upward at least 1/4 inch per foot toward the chimney or exhaust. Secure connections with screws. Note: High-efficiency units (55+ gallons) often require special PVC venting directly outside, a task best left to professionals.
- Fill the tank: Turn on the cold water supply and let the tank fill completely.
- Bleed air from faucets: Open several hot water faucets around the house until the water runs in a steady stream without sputtering.
- Light the pilot: Follow the manufacturer's instructions precisely. Typically, you'll turn the knob to "pilot," press and hold a button, and light the pilot assembly.
- Set the temperature: Once the pilot is lit, turn the knob to "on" and set the temperature to around 120°F to balance hot water availability with safety and efficiency.
- Check the draft: With the main burner on, hold a smoking match or incense stick near the draft hood. The smoke should be drawn up into the vent. If it blows back into the room, you have a dangerous venting problem. Turn off the gas immediately, ventilate the area, and call a professional.
For more tips, see our guide on Efficient Hot Water Heater Installation.
When to Call a Professional for Your Installation
While DIY knowledge is valuable, some parts of a gas water heater installation are best left to certified professionals. Your safety and peace of mind are worth more than the satisfaction of doing it all yourself.
Call a professional when the job involves:
- Complex venting needs: Incorrect venting can lead to a backdraft of deadly carbon monoxide gas. If you are upgrading to a power-vent or direct-vent model, or if the existing vent needs significant changes, professional help is crucial.
- Gas line modifications: Any work on gas lines, such as resizing a line for a tankless unit or rerouting piping, requires a certified gas fitter. Mistakes with gas lines can be catastrophic.
- Soldering copper pipes: If you're not experienced with using a torch to create leak-free, code-compliant solder joints, it's best to have a plumber handle it.
- Local code compliance and permits: Building codes for water heaters vary by location and exist for your safety. Many jurisdictions require a permit and inspection for replacement. A professional plumber understands these regulations and ensures the installation is done correctly.
If you feel unsure about any step involving gas, electricity, or water pressure, trust your gut and call for help.
At Cherry Blossom Plumbing, we provide expert Water Heater Installation Services with our signature "WOW factor" guarantee. Our licensed, family-owned team offers Expert Hot Water Heater Installation that's fast, reliable, and honest throughout Arlington and Falls Church.
Knowing your limits is a sign of wisdom. We're here to handle the complex parts so you can enjoy your new, reliable hot water system.
Frequently Asked Questions about Gas Water Heater Installation
Facing a gas water heater installation brings up many questions. Here are answers to the most common concerns we hear from homeowners in Arlington, Falls Church, and throughout Northern Virginia.
What are the benefits of upgrading to a new, energy-efficient gas water heater?
Upgrading offers several key advantages:
- Lower operating costs: Modern units are highly efficient, leading to noticeable savings on your monthly utility bills.
- Reduced energy consumption: New gas water heaters use less energy, which is better for your budget and the environment. ENERGY STAR® water heaters can significantly reduce GHG emissions.
- Better reliability: A new unit with a fresh warranty means fewer breakdowns and more dependable hot water, especially on cold mornings.
- Modern features: Many new models include electronic ignition, self-cleaning functions, and more precise temperature controls.
For more on high-efficiency options, explore our guide on Energy Efficiency Tankless Water Heaters.
What are common signs that I need a water heater replacement?
Your water heater will usually give warning signs before it fails completely:
- Age over 10 years: Most tank-style water heaters have a lifespan of 10-15 years. After a decade, they are on borrowed time and losing efficiency.
- Leaking tank: Puddles around the base indicate internal corrosion that cannot be repaired. Replacement is the only solution.
- Rusty or discolored water: If hot water from your taps is discolored, the inside of your tank is likely corroding.
- Rumbling or popping noises: These sounds are caused by sediment buildup at the bottom of the tank, which forces the unit to work harder and less efficiently.
- Insufficient hot water: If you're running out of hot water quickly, the unit may be losing heating capacity or may be too small for your needs.
Our guide on Signs Your Home Needs Water Heater Repair can help you decide between repair and replacement.
What's the difference between installing a tank vs. a tankless gas water heater?
The installation process varies significantly between the two types.
- Tank-style installation is generally straightforward, especially when replacing a similar unit. Existing plumbing, gas lines, and venting are often compatible, making for a simpler swap.
- Tankless installation is more complex and often requires significant infrastructure upgrades. These include:
- Larger gas lines: Tankless units require a higher volume of gas and may need a larger diameter gas line run from the meter.
- New venting: Most tankless models use PVC pipes that vent directly through an exterior wall, requiring new holes and pipe runs.
- Electrical outlet: A dedicated electrical outlet is needed to power the unit's electronic controls.
Due to these complexities, Tankless Water Heater Installation almost always requires professional expertise to ensure everything is sized and installed to code.
Conclusion: Enjoy Your Reliable Hot Water
Congratulations on learning about gas water heater installation. From recognizing the warning signs of a failing unit to understanding the final checks on a new system, you've gained valuable knowledge about one of your home's most vital appliances.
To recap, safety always comes first, especially when working with gas. The installation process involves several key stages: safely removing the old unit, positioning and leveling the new one, connecting water and gas lines securely, and verifying proper venting.
Whether you choose a traditional tank or an energy-efficient tankless model, you're investing in reliability and performance. However, while this guide provides knowledge, professional installation is the gold standard for safety and compliance, especially for gas line modifications, complex venting, and meeting local codes.
At Cherry Blossom Plumbing, we bring reliable hot water to families throughout Arlington and Falls Church. Our licensed plumbers are passionate about delivering installations that exceed expectations, backed by our WOW factor guarantee.
Don't let unreliable hot water disrupt your life. Whether you need advice or a complete professional installation, we are here to help. For expert water heater services in Arlington, VA, contact us today! Let's restore warmth and comfort to your home.
Customer Testimonials
Cherry Blossom Plumbing has consistently provided top-notch service, ensuring every issue is resolved efficiently and professionally.
